Thursday, February 23, 2012

Lasagna

Jordan and I are getting to go away this weekend to Dallas and my wonderful in-laws are coming to stay at my house and keep Jasper. I decided to make a lasagna for them to just pop in the oven tomorrow night. My Mom made this growing up and it's still one of my favorite meals to make for Jordan and myself. Needless to say, he was VERY disappointed when he realized we were not having Lasagna tonight and it was for his parents this weekend.

Ingredients:


1 lb sausage
8 oz tomato sauce
6 oz tomato paste
8 oz tomato puree (I can never find this size in the store so I always have to buy a huge can)
2 tsp dried basil
2 tsp dried parsley
2 eggs
1 tsp salt & pepper
2 1/2 cups small curd cottage cheese
3/4 cups Parmesan cheese + more for the top
2 cups Mozzarella cheese shredded
9 lasagna noodles (I usually do 10 just in case 1 tears)

 Step 1:
Bring a large pot of water to boil for your noodles - don't forget to add salt to the boiling water! Also preheat the oven to 375 degrees.


Step 2:
While waiting on the water to boil cook the sausage in a large skillet (make sure the side of your skillet are high enough to accommodate the sauce that will be put in)


Step 3:
While the sausage is cooking you will mix together the cottage cheese, eggs, Parmesan cheese, parsley, salt, and pepper. Mix well - notice how nice and yellow the yokes of my eggs are? They were given to be by a friend who have chickens! I love fresh eggs!


Step 4: 
Once your sausage is cooked drain off any fat and bring back to the stove and add the basil, tomato paste, sauce, and puree. Let simmer on low while your noodles finish cooking. 
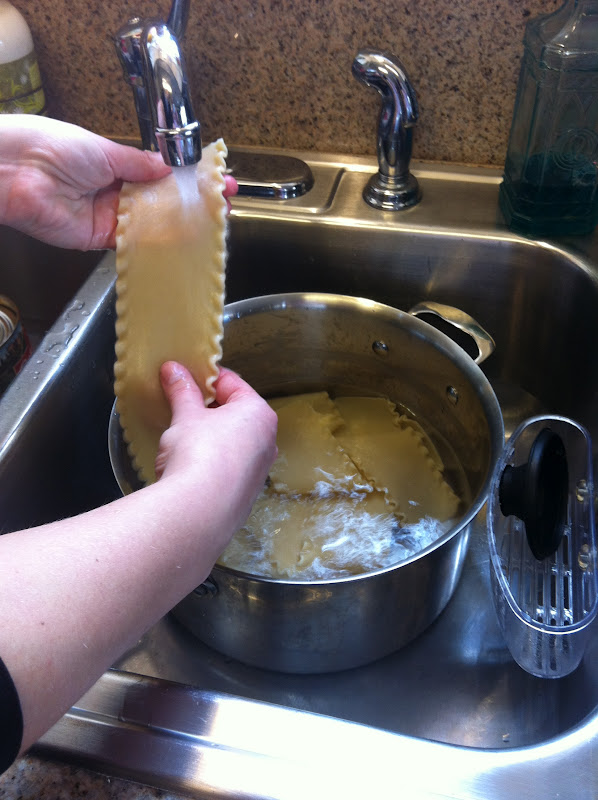


Step 5: 
When your noodles are done drain the water off and rinse your noodles with cold water. 
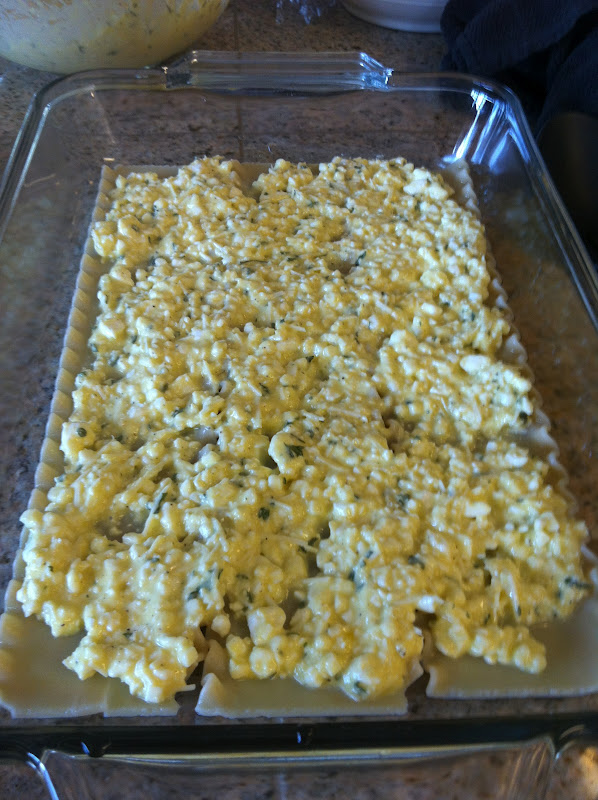

Step 6: 
Take a 9X13 pan and lay out flat 3 of the noodles


Step 7:
Next put 1/2 of the cottage cheese mixture on top of the noodles and spread out with a spatula


Step 8: 
Now put 1/2 the sausage mixture on top of the cottage cheese and spread out with a spatula


Step 9: 
Sprinkle 1 cup of the Mozzarella cheese on top of the sausage mixture


Step 10:
Lay 3 more noodles on top and repeat. Note: After I put my second layer of noodles down i use my hands and press on the noodles to level out the lasagna.

Step 11:
End with 3 noodles on top and sprinkle with Parmesan cheese 


Step 12: 
Cover with foil and bake for 30-35 minutes at 375 degrees.
Enjoy!

*I'll post a picture of the finished product when I get back :)


Tuesday, February 21, 2012

Pacifier Clip Tutorial

I didn't figure out how to make these until AFTER we got rid of Jasper's paci - but I enjoy making them for friends and can't wait to make some for baby #2 (not yet, but soon). 

Supplies: 
Fabric
Fusible Interfacing 
Coordination thread to match fabric
Ribbon that matches your fabric
Fabric Glue
Suspender clip (I buy mine in bulk from here UMX I use the CM1024- they are 1" - you can also find them in your local craft store)
Sewing Machine
Iron & Ironing board
Rotary Board & Rotary cutter (optional but highly recommended if your a horrible cutter like me)
Elastic or if you use a MAM paci you can buy these Mam adapter rings

Note: Please excuse my crafting iron board cover I need a new one badly. Also for my fingernails who don't even know what a manicure is these days...

 Step 1: 
Cut a strip of fabric that is 2 1/2 inches wide X 10 inches long (This will also depend of what kid of suspender clip you get. Mine have a 1" opening this is the size to fit that size opening)


Step 2:
Cut a strip of fusible Interfacing material (mine is just fusible on one side). I cut my strip smaller than my fabric so I cut the interfacing at  3/4 X 9 inches 


Step 3:
Next you are going iron the fabric in half long ways with the right sides of the fabric together 


Step 4:
Next place the interfacing in the middle of the fabric and iron down


Step 5:
Now you will start sewing. I sewed a zigzag stitch down both sides


Step 6:
Next I attach a large safety pin and work it through and turn the fabric right side out. Then I iron the fabric down nice and smooth and try and line the edges up 


Step 7:
Back to the sewing machine and sew a straight stitch down both sides on the edge of the fabric. This will get it a nice finished look


Step 8:
Take your suspender clip and slid it on to the end of your fabric. Fold the fabric backwards on itself I press mine, pin it, and then sew a large zigzag stitch across (Sorry my stitch is not straight! I'm by no means a perfect sewer)


Step 9:
Next cut a piece of ribbon and and piece of elastic (mine were around 4 inches). On the back side use a dot of fabric glue and fold the fabric down (make sure the way you fold the fabric is going the same way as you folded it on the opposite end)  


Step 10: 
Now take the piece of elastic and put a dot of fabric glue on top of that fold you just glued down and make a loop placing the 2 ends on the folded down edge. You will use the ribbon to hide this later on. 


Step 11: 
Take your piece of ribbon and place the edge of the ribbon to the edge of the fabric. Then wrap the ribbon all the way around the front of the fabric and loop it back around. Next you are going to fold the fabric back on itself. Once the ribbon is in place I press it with the iron really well - then pin it. 


Step 12:
Now I will sew all 4 edges of the ribbon around into a square pattern. 

Step 13:
You're all done! Clip on your baby and go!


Saturday, February 18, 2012

Valentines Day Roses

I had to share my beautiful flowers I won from PetalsPaintsPortraits blog! My best friend's mom (Alison Piantanida - aka The Flower Girl) is a florist here in town and makes the most beautiful flower arrangements and does amazing wedding flowers (including my own!). She had a drawing on her blog for a Valentines Day arrangement that I won! I never win anything! Check out her inspiring blog she is one of the craftiest people I know! Here are few pictures - Enjoy!


Tuesday, February 14, 2012

Fantasy Fudge

For the past 7 years at Christmas time I have made Fudge and other goodies for family, friends, and all of my husband's employees (He manages a restaurant - so there are a lot of them!) Usually around October I get people starting to ask about my fudge! This fudge I make in the microwave and is SO easy! I thought I would share this super simple fudge recipe that my mom gave to me.

1 1/2 sticks butter (melted)
3 cups sugar
5 oz evaporated milk
1 jar marshmallow cream
1 pkg semi sweet chocolate chips
1 tsp vanilla (sorry not in the picture)
1 cup nuts (I use walnuts)
A large microwave safe bowl


Step 1:
Microwave butter for 1 minute (or until melted)


Step 2:
Add sugar and evaporated milk and mix well. Microwave for 3 minutes and stir then microwave for another 2 minutes and stir - be sure to scrap down the sides well.


Step 3:
Microwave for 3 minutes and stir. Microwave for 2 1/2 minutes and then let it sit in the microwave for 2 minutes. 

 (Note: The next few steps need to go pretty fast or the fudge will not set up right.)

Step 4:
Take out of microwave and add chocolate chips and stir until melted. 


Step 5: 
Add marshmallow cream, vanilla, and nuts and stir until well combined


Step 6:
Pour into a greased or foil lined 9X13 pan and let cool at room temperature
(This year I lined my pan with foil let set and pulled the whole thing out and cut the fudge into bars - it made the edges of my fudge a lot nicer and cut down on my dishes!)


Cut into small squares and enjoy yourself or share with friends!